
Most PowerPoint animations are initiated by mouse clicks. However, you can set up PowerPoint animations to activate automatically in a sequence or all at the same time. The first trick to controlling animation timing is to list the effects in the custom animation in the correct order. Effects are added to the list in the order you create them, but you can reorder them by dragging the effects up or down in the Custom Animation task pane.
After you get the effects in the right order, choose an option from the Start drop-down list that’s near the top of the Custom Animation task pane to set the Start setting for each effect. This setting has three options:
On Click: Starts the effect when you click the mouse or press Enter
With Previous: Starts the effect when the effect above it starts
After Previous: Starts the effect when the preceding effect finishes
With your PowerPoint presentation open and the slide you want to animate selected, follow these steps to time animations:


1.Click the Animations tab on the Ribbon and click Custom animations.
The Custom animations task pane opens.
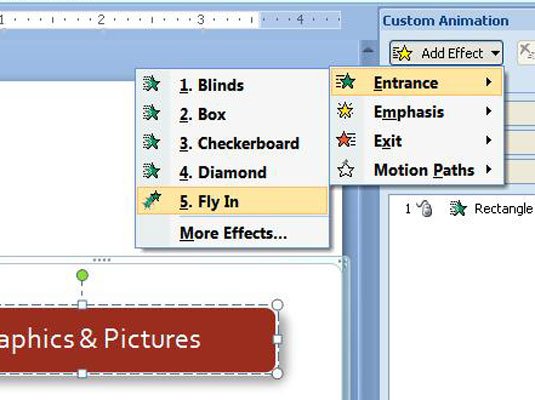

3.Change the Fly In entrance effect second object.

4.Add a Fly In entrance effect for the final object.
You may also be interested in:PowerPoint to DVD
PowerPoint to Video Converter
PowerPoint to FLV Converter
Burn PPT to DVD
PowerPoint to DVD for Education
PowerPoint to Video for Education
PPT for Web
PPT to PDF
PPT to DVD Burner
PowerPoint to Video
PowerPoint to DVD Burner
Best Corporate Video Production Company in Bangalore and top Explainer Video Company, 3d, 2d Animation Video Makers in Chennai
ReplyDeleteGreat information about film makers net neutrality really we liked this article.